How to create Amplifier knob
Today I came up with another Photoshop tutorial and in this photoshop tutorial we are going to discuss how to create amplifier knob with the help of Adobe Photoshop CS5. In this photoshop tutorial we will cover how to manipulate with gradient effect to get the better results. Photoshop is very good software to manipulate with different tools and effects to design your desired creation. So today in this tutorial we are going to design an Amplifier Knob and it is basically for beginners who are really new and amazed with photoshop tricks.
Lets start this tutorial with opening adobe photoshop in your screen and following steps:
Step 1 – Open Photoshop and create “New Document”
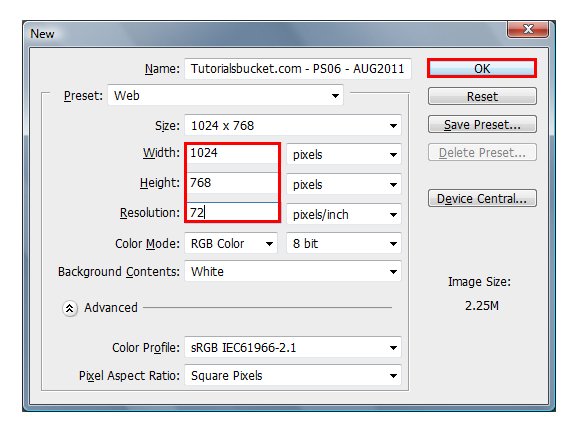
Let’s start with creating a new document in abobe photoshop, so goto File > New … (Ctrl + N) and a popup box will appear and ask for document size and further details. By the way! I am going to use (1024px x 768px) size document.
Step 2 – Create Guide lines
Now go to View -> New Guides… and when you click New Guides… a popup box appear named as;
“New Guide“. Select Orientation -> Horizontal, Position -> 50% and Click OK
Now again repeat above step but now this time select Orientation -> Vertical.
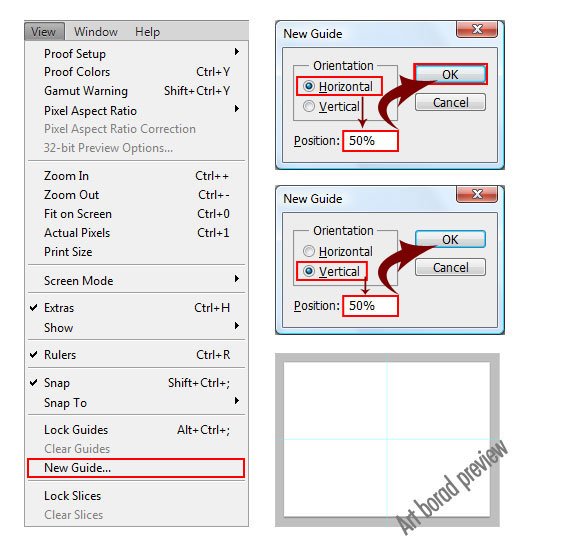
In this step we use guides to know the center point of the document, because we draw our shapes in the center of the document.
Step 3 – Draw Shape
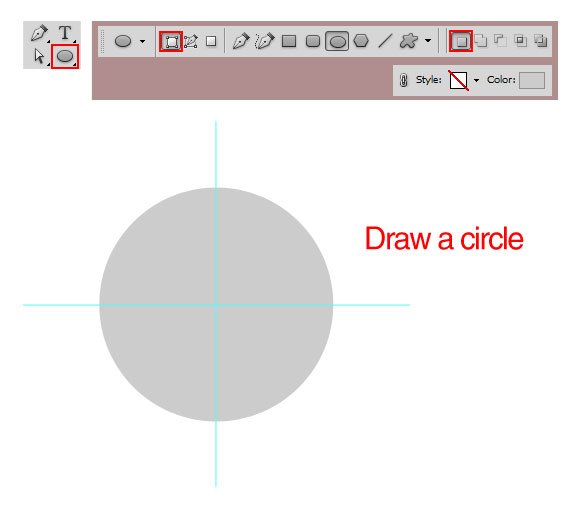
Now a draw a circle with the help of “Ellipse Tool” and select the following option from the tool bar.
Step 4 – Blending Options
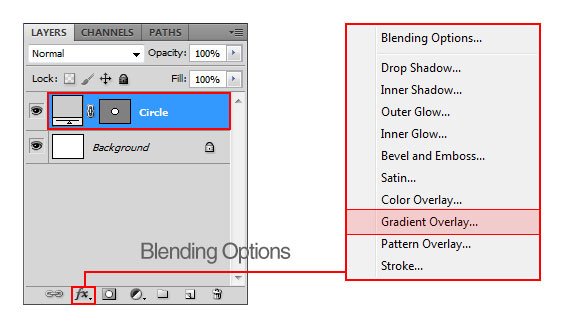
Now it is a time to play with blending option to get desired results. Goto the Layers Panel and click “Blending Option” and you will see a popup box with lot of more options and then we select “Gradient Overlay”
After selecting “Gradient Overlay” you will notice a popup box appear, so the task is simple please follow the following image for accurate results.
- Blend Mode : Normal
- Opacity : 100%
- Gradient : Please check below this image for gradient color setting
- Style : Angle and tick (check) Align with Layer
- Angle : -120 Degree
- Scale : 100%
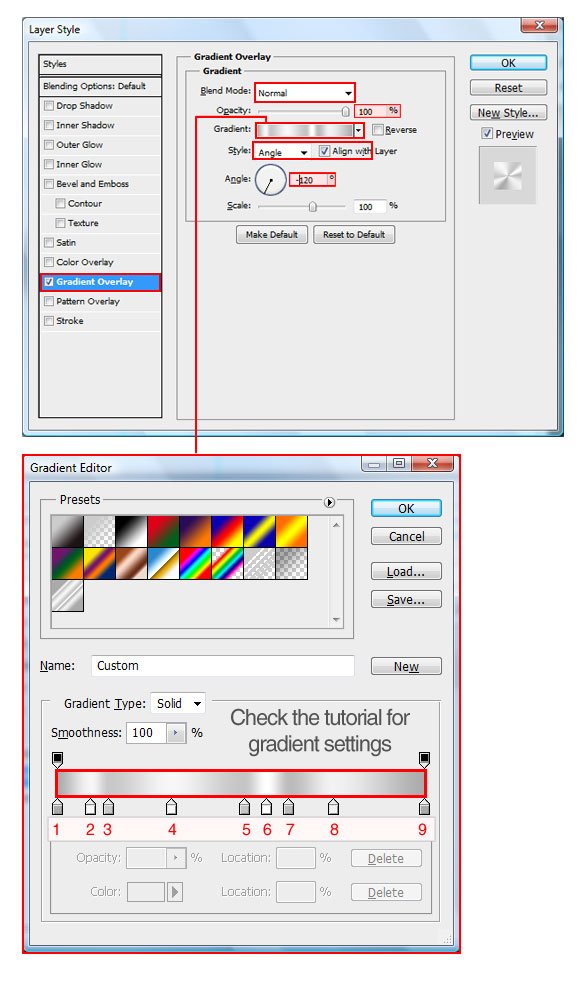
Power of Gradient in this Photoshop tutorial
Gradient Settings:
- Color : #aaaaaa, Location: 0%
- Color : #f7f7f7, Location: 9%
- Color : #c8c8c8, Location: 14%
- Color : #f7f7f7, Location: 31%
- Color : #c5c5c5, Location: 51%
- Color : #ffffff, Location: 57%
- Color : #bbbbbb, Location: 63%
- Color : #f2f2f2, Location: 75%
- Color : #aaaaaa, Location: 100%
Now Select “Bevel and Emboss” and follow the following settings;
- Style : Inner Bevel
- Technique : Smooth
- Depth : 100%
- Direction : up
- Size : 1px
- Soften : 0px
- Angle : 111 degree & 42 degree
- Highlight Mode : #ffffff and Opacity : 100%
- Shadow Mode : #000000 and Opacity : 32%
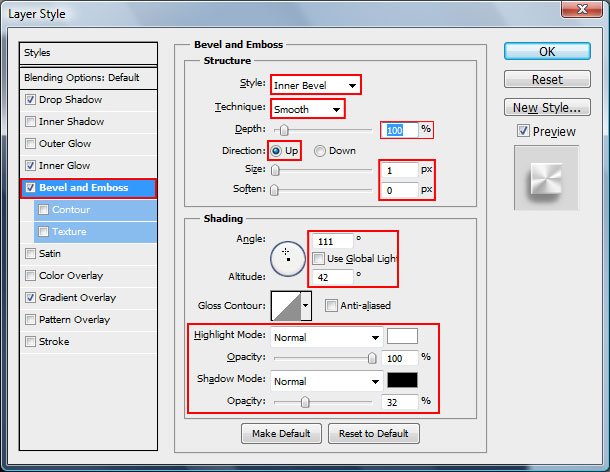
Inner Glow Settings:
- Blend Mode : Normal
- Opacity : 100%
- Noise : 0%
- White color: #ffffff
- Technique : Softer
- Source : Edge
- Choke : 0%
- Size : 3px
- Range : 50%
- Jitter : 0%
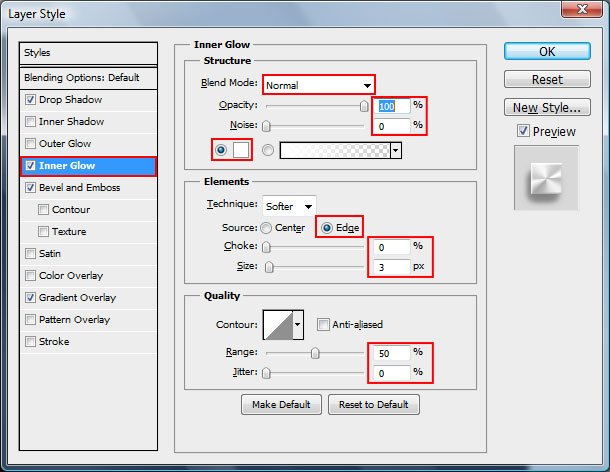
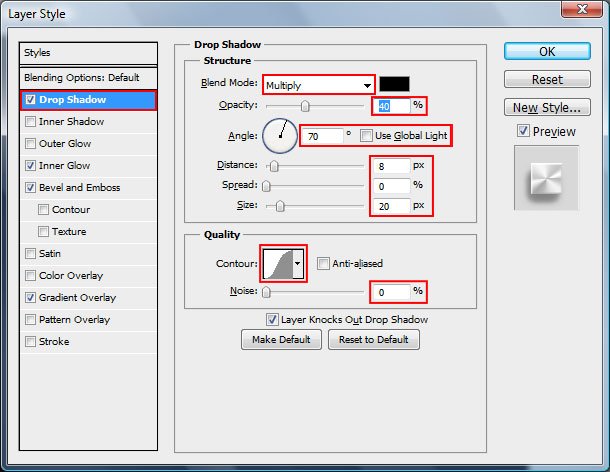
Drop Shadow Settings:
- Bend Mode : Multiply -> black color
- Opacity : 40%
- Angle : 70%
- Distance : 8px
- Spread : 0%
- Size : 20px
- Noise : 0%
And finally click OK button
After playing with blending you are able to see the following results on your screen, but it’s not enough we have to give this final touch.

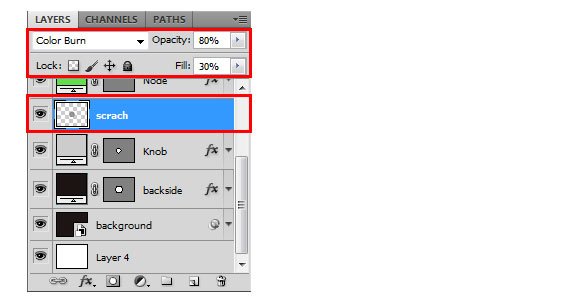
Now hold the Ctrl key from you keyboard and click over the circle shape from Layers and you will see that the circle from artboard is already select, now create new layer ( Shift + Ctrl +N ) and Fill (G) with #cccccc. And select Color Burn, Opacity: 80% and Fill 30%.
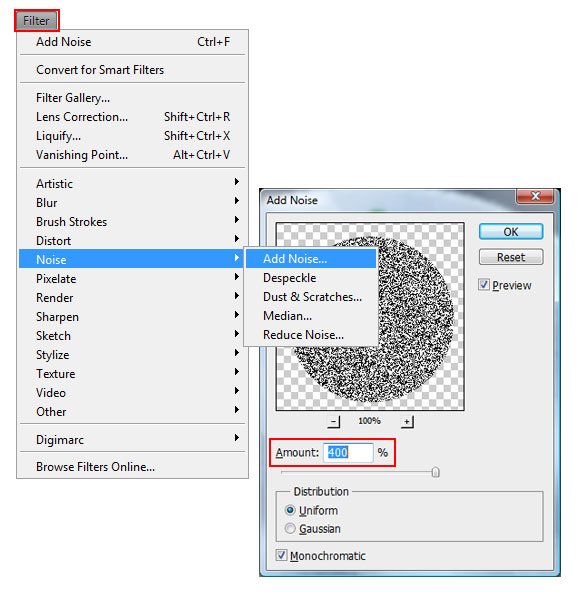
And goto Filter -> Noise -> Add Noise and you will see a popup box “Add Noise” and set the Amount : 400%, Distribution : Uniform and tick the Monochromatic.
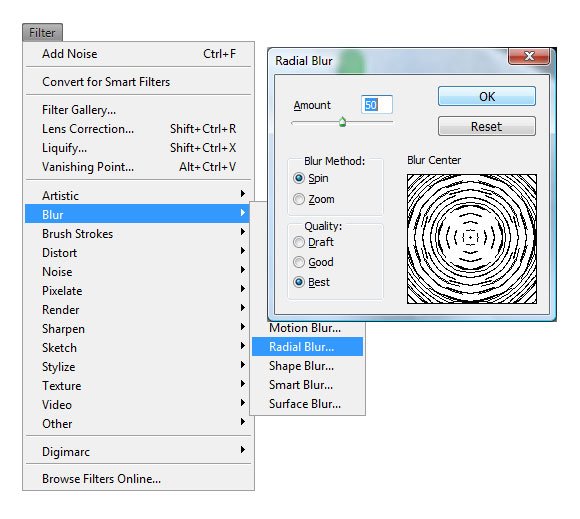
Next Step is Filer -> Blur -> Radial Blur. Then Radial Blur, Amount : 50, Blur Method : Spin and Quality : Best.
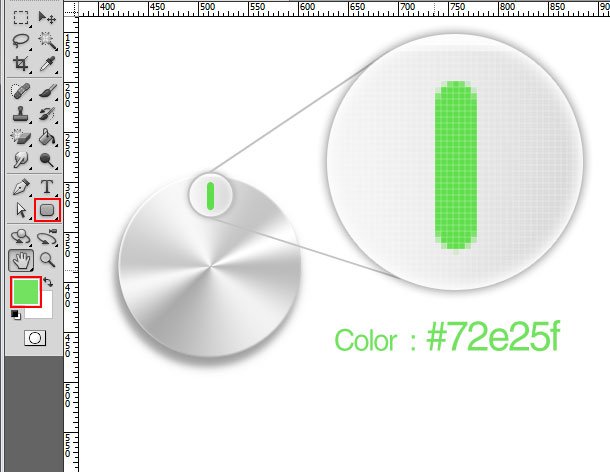
Step 5 – Draw node
Let’s draw node over the circle shape with the help of “Rounded Rectangle Tool” same as following image.
After the above step let’s add some blending style for final results:
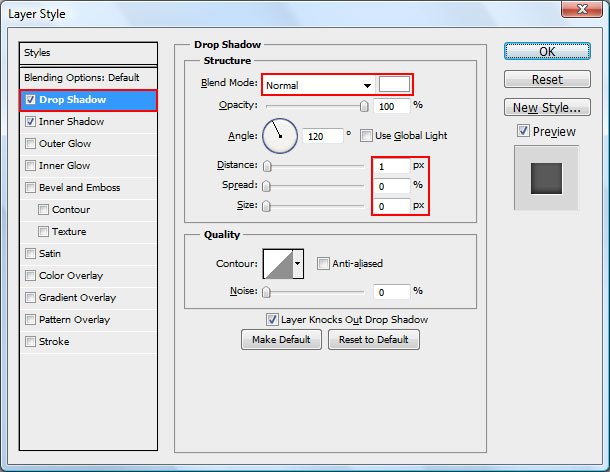
Select Drop Shadow:
- Blend Mode : Normal and color white
- Opacity : 100%
- Angle : 120 degree
- Distance : 1px
- Spread : 0px
- Size : 0px
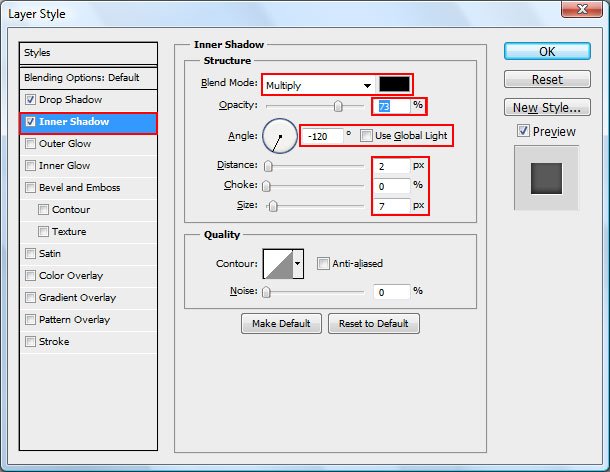
Inner Shadow:
- Blend Mode : Multiply with Black color
- Opacity : 73%
- Angle : -120 degree
- Distance : 2px
- Choke : 0%
- Size : 7px
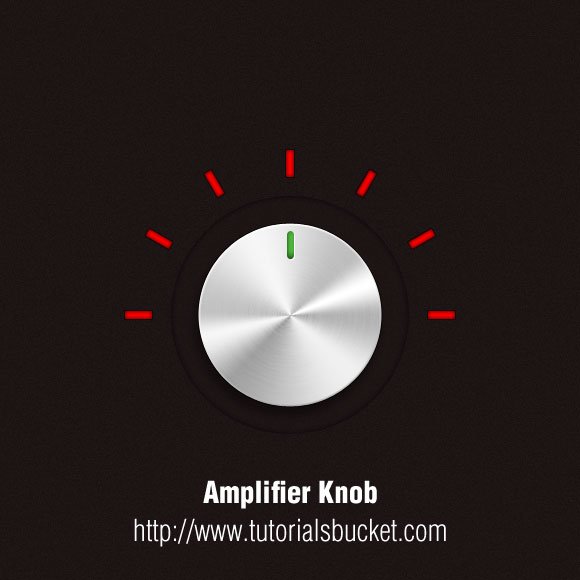
Add some cool background and if you want to add more things in your drawing you can. Please take a look at my final results bellow;
I hope you like this photoshop tutorial and give me you comments.
Leave a Reply